
ADVERTISEMENT
ADVERTISEMENT
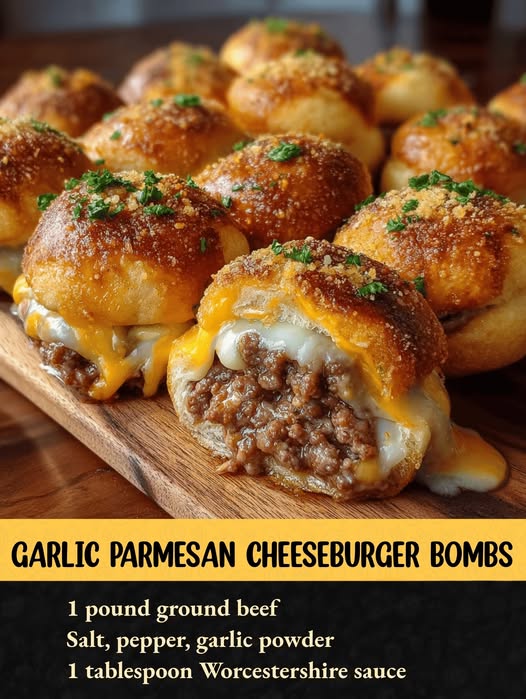
Garlic Parmesan Cheeseburger Bombs
Instructions
In a large skillet over medium heat, cook the ground beef until evenly browned and no pink remains. Drain excess fat. Season the cooked beef with salt, pepper, garlic powder, onion powder, and Worcestershire sauce. Set aside to cool completely.
Once the beef mixture is cooled, fold in the shredded cheese and any optional add-ins such as bacon, pickles, or caramelized onions. Mix until the filling is evenly combined.
Flatten each piece of dough into a 10 cm circle. Place 1–2 tablespoons of the cooled beef and cheese mixture in the center of each round. Gather the edges and pinch tightly to seal, forming a ball.
Position the filled dough balls seam-side down on a parchment-lined baking tray, spacing evenly. Combine melted butter and minced garlic, then generously brush over the tops. Sprinkle with Parmesan cheese.
Preheat oven to 190°C. Bake for 15–18 minutes or until the dough is cooked through and golden brown.
As soon as they are removed from the oven, brush with any remaining garlic butter and garnish with chopped fresh parsley if desired. Serve warm with preferred dipping sauces such as ranch, garlic aioli, or spiced mayonnaise.
Storage Tips
Let the bombs cool completely before transferring to an airtight container They will keep in the fridge for up to three days For longer storage freeze individually on a tray then seal in a freezer bag and keep up to two months Reheat in a hot oven so the pastry gets crispy again
Ingredient Substitutions
No biscuit dough on hand Use pizza dough rolled thin Crescent roll dough works in a pinch For the cheese try a sharp cheddar for punch or provolone or Swiss for a milder melt If Worcestershire is missing soy sauce with a splash of balsamic adds depth
Serving Suggestions
Serve as party appetizers alongside toothpicks and multiple dipping sauces They make a fun lunch paired with salad or crunchy pickles I love packing a few for picnic lunches or topping each bomb with a spicy jalapeno slice before baking for a little extra heat
Cultural Roots
Cheeseburger bombs borrow their soul from classic American burger flavors wrapped up in the convenience of a hand pie This mash up makes them both nostalgic and fun The trend of burger inspired bakes has spread through potlucks and family gatherings across the country Everyone loves discovering gooey cheese hidden in a golden pillow of bread
Pro Tips
Seal the dough well so the cheese stays inside during baking
Always cool the burger filling before stuffing to avoid soggy dough
Brush the bombs twice with garlic butter for double the shine and rich flavor
No matter the season these cheeseburger bombs are a true crowd pleaser and a clever twist on burger night Kids love helping assemble and everyone loves pulling them apart at the table
Frequently Asked Questions
→ Can I add extra fillings to the beef center?
Yes! Try crisply cooked bacon, pickles, or caramelized onions to personalize each bomb.
→ What kind of cheese works best?
Cheddar brings sharpness, while mozzarella melts smoothly. Use either or combine both for extra flavor.
→ Is homemade dough required?
Refrigerated biscuit or pizza dough is quick and convenient, but homemade dough also works great if desired.
→ How do I prevent them from leaking?
Ensure dough edges are well sealed and fully encase the filling before baking for best results.
→ What sauces pair well for dipping?
Ranch, garlic aioli, and spicy mayo all complement the savory cheesy filling.
→ Can these be made ahead?
Assemble and refrigerate unbaked bombs for a few hours in advance; bake just before serving.
Notes
Allow the beef mixture to cool before adding cheese to prevent melting and separation.
Sealing the dough well prevents cheese from leaking during baking.
Tools You’ll Need
Large skillet
Mixing bowl
Baking tray
Parchment paper
Pastry brush
Oven
ADVERTISEMENT
ADVERTISEMENT
