
ADVERTISEMENT
ADVERTISEMENT
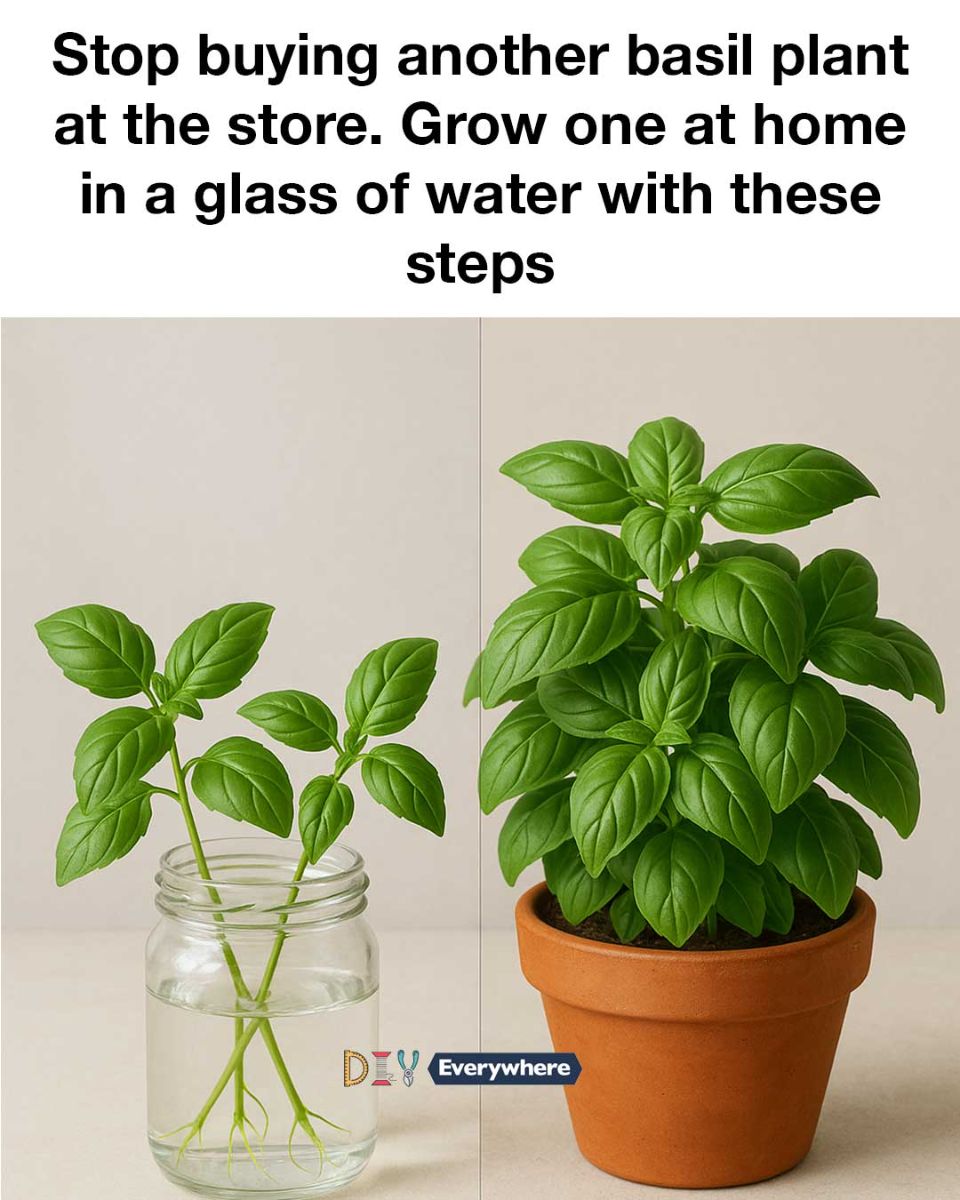
Stop buying another basil plant at the store. Grow one at home in a glass of water with these steps
5. Step-by-Step Guide to Preparing Your Basil Cutting
Begin by selecting a healthy basil plant with vibrant green leaves. Using sharp scissors, cut a 4-6 inch stem just below a leaf node, where leaves attach to the stem. Remove the leaves from the bottom 2 inches of the cutting to prevent them from rotting in the water.
Place the cutting in a glass of water, ensuring that the leaf nodes are submerged. These nodes will develop roots, so it’s crucial they remain underwater. Position the glass in a warm, sunny spot to encourage root growth.
6. How to Properly Place Your Basil in Water
Once your cutting is prepared, place it in a glass of water with the cut end submerged. Ensure that the glass is tall enough to support the cutting and prevent it from tipping over. It’s important to change the water every few days to prevent stagnation and promote healthy root development.
As the cutting begins to root, you may notice small white roots emerging from the leaf nodes. This is a sign that your basil is thriving and will soon be ready for harvesting.
7. Optimal Light Conditions for Basil Growth
Basil thrives in bright, indirect sunlight. Place your glass of basil cuttings near a south-facing window where it can receive 6-8 hours of light per day. If natural light is limited, consider using a grow light to supplement the plant’s needs.
Be mindful of temperature fluctuations, as basil prefers a consistent environment. Avoid placing the plant near drafts or heat sources, which can stress the plant and hinder growth.
8. Maintaining Water Quality for Healthy Basil
Maintaining clean water is crucial for the health of your basil plant. Change the water every 3-4 days to prevent the growth of algae and bacteria. If using tap water, let it sit for 24 hours before adding it to the glass to allow chlorine to dissipate.
Consider adding a small amount of liquid plant food to the water every two weeks to provide essential nutrients. Follow the manufacturer’s instructions for dilution rates to avoid over-fertilizing.
9. Recognizing and Addressing Common Growth Issues
Common issues with hydroponic basil include yellowing leaves, which can indicate nutrient deficiencies or poor water quality. Ensure that the plant is receiving adequate light and nutrients, and regularly change the water to prevent stagnation.
If you notice mold or algae growth, clean the glass thoroughly and trim any affected roots. Keeping the water fresh and the environment clean will help prevent these issues.
10. When and How to Harvest Your Basil
Once your basil plant has developed a healthy root system and new leaves, it’s ready for harvesting. Use sharp scissors to trim the stems just above a pair of leaves, which will encourage the plant to grow bushier.
Regular harvesting not only provides fresh basil for your kitchen but also promotes continued growth. Aim to harvest once the plant has at least 6-8 leaves, and avoid removing more than one-third of the plant at a time.
11. Creative Uses for Your Homegrown Basil
Homegrown basil can be used in a multitude of culinary applications. Add fresh leaves to salads, sandwiches, and pasta dishes for a burst of flavor. Basil can also be blended into pesto, infused into oils, or used to garnish cocktails.
Beyond the kitchen, basil’s aromatic properties make it a natural air freshener. Place a few sprigs in a vase to enjoy its fragrance throughout your home. With a little creativity, your homegrown basil can enhance both your meals and your living space
ADVERTISEMENT
